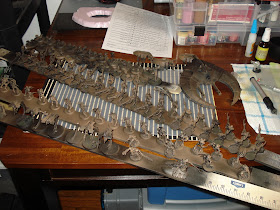
So to speak. Let's walk through the process so far, and note I'm going to be using Brian's (A Gentleman's Ones) rust recipe, with some minor variations, so follow the LINK for a perusal then hurry back!
Cleaning: Many of the models had to be dropped in the bath...
...then the excess paint removed.
Paint Stick: Here I'm pulling out every model I'll need, with a fresh copy of the army list in front of me...
Priming: ...'cause all this is getting done at once!
Batch Spraying: I hit every model at once, with a complete black then brown fades from various angles. The brown will allow me to skip some of the steps Brian uses.
Minor Repairs: At this point, any serious flash lines will just pop! Those gotta go. Also, some of the models I hadn't pinned in the previous step chose this point to fall apart - no shortcuts there. I took the time to effect repairs.
Lay Out the Work Area: I have the tools and paints I intend to use right in front of me.
Test Models: I used the Spyders as the initial test of my foam-thingy-tool; the stippling works just fine. Most importantly, it's quick!
Here's a closeup. The next step is using the airbrush for the washes then drybrushing metal for the completed look.
Here's the colors I'm planning on using for the weapon effects, but in hindsight blue is probably the better choice.
That's it for now! Back to work!


I can't wait to break your soul... :)
ReplyDelete